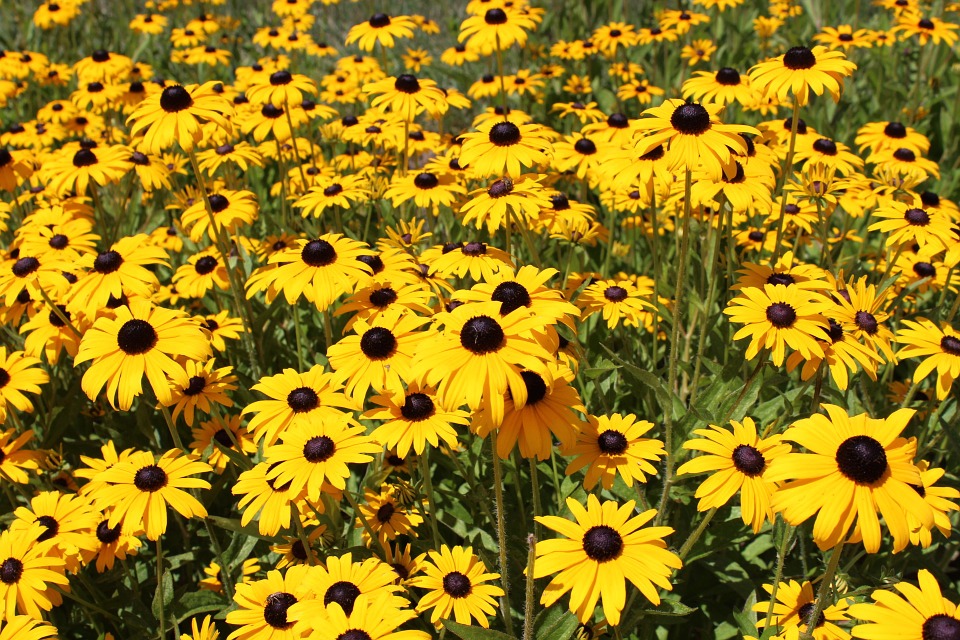
One of my favorite late season bloomers are perennial Black-Eyed Susans. Their bright yellow flowers light up my flower beds as my purple coneflowers are fading. The goldfinches continue to visit, feasting on this new source of seeds.
What are Black-Eyed Susans?
Black-eyed susans are a native plant, originally growing in the Eastern and Central areas of North America. Since colonization, they have been introduced in and have naturalized in the western parts of North America. They are members of the sunflower family. Their Genus is Rudbeckia. The two most commonly grown species are Rudbeckia hirta which are annuals and Rudbeckia fulgida which are perennials that are hardy in zones 4 through 9.
Both annuals and perennials grow 1 to 3 feet tall with flowers that are 2 to 3 inches across. The leaves are stiff and hairy. The annuals bloom from June until frost. Bloomtime for the perennials is late summer into fall.

My Favorite Varieties of Black-Eyed Susans
My favorite among the annuals is Rudbeckia hirta ‘Cherokee Sunset’ . It was an All America Selections Award
Winner in 2002. The plants grow and bloom readily from seed. The colors of the semi-double flowers are superb: rust, orange, yellow and gold. I deadhead the flowers all summer but stop deadheading in the fall to allow the flowers to go to seed. They freely reseed into my garden and come up again the following year. I have only ever purchased one package of seed because they have reliably reseeded every year since.

My favorite among the perennials is Rudbeckia fulgida var. sullivantii ‘Goldsturm’. It won the prestigious Award of Garden Merit of the Royal Horticultural Society in 1993 as well as the Perennial Plant of the Year Award in 1999. I love it because it is reliably hardy, blooms profusely, and readily spreads without being invasive. Whenever I have a spot in my garden where other plants struggle, I just transplant a clump of Goldsturm into that spot. The following year, it is blooming and starting to fill in the space.
How to Grow Black-Eyed Susans
Black-eyed susans grow best in full sun but will tolerate partial shade. My experience is that they do better in partial shade than other sun plants that supposedly will grow in partial shade. Space your plants 18 inches apart in well drained soil. Keep them watered. Try not to let them dry out. Like most native plants, they don’t need regular fertilizing. You can use a balanced fertilizer, such as 10-10-10, once in the spring if you like.
Deadhead the annual species to keep them blooming all summer. Remove spent flowers from the perennials to encourage the plants to continue to bloom into the fall. You can either cut the perennials down to the ground after frost or you can leave the plants over the winter so that the birds can snack on the seed heads. In the spring, cut down the dead plants so that the new growth will be able to grow unimpeded.
How to Divide Black-Eyed Susans
Perennial black-eyed susans should be divided every 3 to 5 years to keep the plants healthy. If left undivided, the plants become overcrowded which encourages disease and insect infestation.
To divide your plants, use a shovel to dig up the entire clump. Then, using your fingers, gently pry it apart into 3 or 4 pieces depending on how large the clump is. Discard any dead or diseased plants from the clump. Make sure that each division has both roots and leaves. Replant your new divisions 18 inches apart.
How to Grow Black-Eyed Susans From Seed
Black-eyed susans are easy to grow from seed. The annuals and the perennials are handled a little differently.
Annual Seeds
You can direct sow the annual seed in your garden in the spring once the daytime temperatures are reliably 60⁰F or warmer. Sprinkle the seeds on top of the soil. Do not cover them. They need sunlight to germinate. Germination should occur in 7 to 21 days. Once they have their second set of leaves, thin them to 18 inches apart.
You can also start your annual seeds indoors. Start them two weeks before your last frost date. Sow the seeds on top of the soil. Do not cover them. They need light to germinate. Germination should occur in 7 to 21 days. You can transplant your seedlings outdoors when the daytime temperatures are reliably 60⁰F. Space them 18 inches apart.
Perennial Seeds
Perennial seeds need a period of cold stratification. The easiest way to do this is to sow your seeds in fall. Sow them on top of the soil. Do not cover them. They need sunlight to germinate. The seeds will germinate in the spring when the soil warms.
You can also start your seeds indoors. Start them 6 to 8 weeks before your last frost date. Sow the seeds on the surface of moistened soil. I always water my soil before planting my seeds, especially surface sown seeds, because I have discovered that if I water after planting my seeds, both the seeds and the soil will float out of the container. Do not cover the seeds. They need light to germinate. Cover the container with a plastic bag and put the whole thing in your refrigerator for 4 weeks. This mimics winter weather.
Check the container periodically to make sure the soil remains moist. Use a mister to moisten the soil if it starts to dry out. After 4 weeks, remove the container from your refrigerator and remove the plastic. Place the container under lights or on a sunny windowsill. Germination should occur in 7 to 21 days. You can transplant your seedlings into your garden when the soil warms. Space them 18 inches apart.
Leave a Reply